Wednesday, July 27, 2005
Masking off the Natural Binding
PRS pioneered the use of "natural binding" on guitars. Instead of using an inlay around the top of the guitar a strip of wood is left free of color which looks like a natural wood binding.
This may be done by masking off the binding before adding color and removing it afterwards. However, some finish inevitably gets under the masking onto the raw wood which can be difficult to remove. Following the lead of those more experienced than myself I decided to mask off everything but the binding so I could protect it with some clear varnish before adding any color.
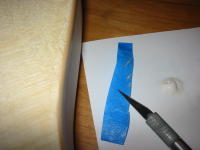
I carefully measured the depth of the binding around the top of the guitar using bits of tape to mark the depth.

Masking the sides was pretty easy after that. I decided to include the two beveled cut outs in the binding for contrast. Masking them was a bit more effort but I'm sure it'll be worth it.

I set up a makeshift painting booth in my garage. I used lots of newspaper and drop cloths to protect everything. I stopped after four coats reasoning that this is just for protection not the final finish.


After it was dry I removed the masking tape. And now for today's lessons.

After carefully gluing the splinters back in place with some wood glue I was rather pleased with the result. Notice the darker stripe around the top edge.

This may be done by masking off the binding before adding color and removing it afterwards. However, some finish inevitably gets under the masking onto the raw wood which can be difficult to remove. Following the lead of those more experienced than myself I decided to mask off everything but the binding so I could protect it with some clear varnish before adding any color.
I carefully measured the depth of the binding around the top of the guitar using bits of tape to mark the depth.

Masking the sides was pretty easy after that. I decided to include the two beveled cut outs in the binding for contrast. Masking them was a bit more effort but I'm sure it'll be worth it.

I set up a makeshift painting booth in my garage. I used lots of newspaper and drop cloths to protect everything. I stopped after four coats reasoning that this is just for protection not the final finish.


After it was dry I removed the masking tape. And now for today's lessons.
- If you've got a bad back don't set up a painting booth on the floor (duh).
- Remove the masking tape slowly. I managed to peel off a few splinters which were almost deep enough to expose the wood of the body beneath.

After carefully gluing the splinters back in place with some wood glue I was rather pleased with the result. Notice the darker stripe around the top edge.
